How to Connect AirPods to Laptop: A Complete Technical Pairing Guide
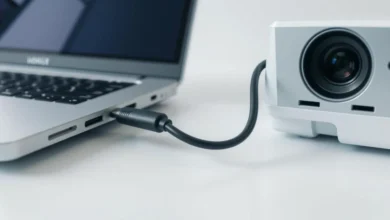
Integrating Apple’s premium audio ecosystem with a Windows environment is a common challenge, but learning how to connect airpods to laptop devices is simpler than most users realize. While AirPods are designed to thrive within the iOS framework, they utilize standard Bluetooth protocols that allow them to function as high-quality peripherals for PC users. The primary hurdle often involves navigating the Windows Bluetooth stack, which requires specific steps to ensure the H1 or H2 chips inside your earbuds enter the correct pairing state.
By establishing this cross-platform connection, you unlock the ability to enjoy high-fidelity audio during professional Zoom meetings, gaming sessions, or casual media consumption without being tethered to your desk. This guide provides the technical precision needed to bypass common handshake errors and achieve a stable, low-latency wireless experience on any modern laptop.
Preparing Your Hardware for a Seamless Bluetooth Handshake
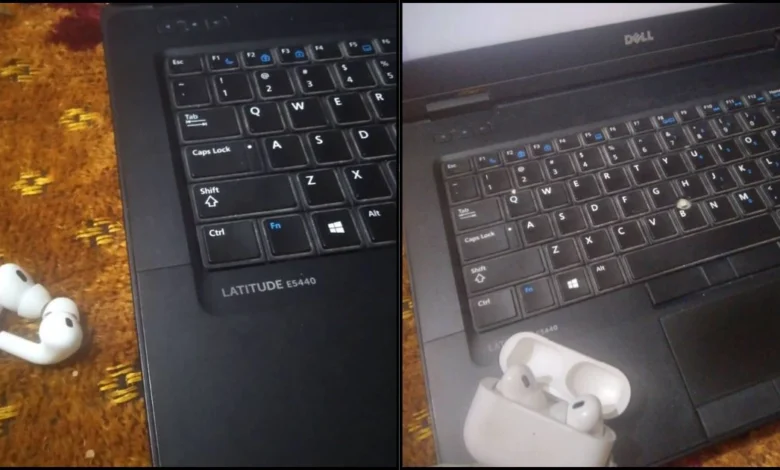
Before diving into the software settings, you must ensure your hardware is physically ready for the process of how to connect airpods to laptop systems. The most critical step is placing your AirPods back into their charging case and keeping the lid open, which signals to the internal firmware that a new connection is being requested. You must locate the small, circular setup button on the back of the case and press it firmly until the status light begins to pulse a soft, rhythmic white.
This blinking light indicates that the AirPods are now in “Discovery Mode,” broadcasting their Bluetooth signal to any nearby receivers. Without initiating this specific hardware state, your laptop will fail to recognize the device, leading to frustrating search loops that prevent successful pairing.
Step-by-Step Configuration for Windows 11 and Windows 10
The actual software procedure for how to connect airpods to laptop users differs slightly depending on which version of the Windows operating system you are currently running. On Windows 11, you must navigate to the “Bluetooth & Devices” menu within your system settings and click the large “Add Device” button to trigger a local scan. For Windows 10 users, the path involves going to “Settings,” then “Devices,” where you will select “Bluetooth & other devices” to find the pairing toggle.
Once your laptop identifies the AirPods in the list of available hardware, simply click on the name of your device to finalize the digital handshake. After the status changes to “Connected,” your system will automatically route all system sounds and microphone input through the Apple earbuds, providing a seamless transition from mobile to desktop audio.
AirPods Connectivity Comparison: Windows vs. macOS
| Feature | macOS Experience | Windows Laptop Experience |
| Pairing Speed | Instant (via iCloud) | Manual (Bluetooth Settings) |
| Microphone Quality | High Definition | Standard (HSP/HFP Profile) |
| Automatic Switching | Fully Supported | Not Supported (Manual) |
| Battery Monitoring | Native Menu Bar | Requires Third-Party Apps |
| In-Ear Detection | Automatic Pause | Not Supported |
Troubleshooting Common Connection and Driver Errors
Even after learning how to connect airpods to laptop hardware, you may encounter technical glitches such as audio stuttering or “Pairing Failed” notifications. These issues are typically rooted in outdated Bluetooth drivers or interference from nearby 2.4GHz wireless signals that disrupt the narrow-band frequency used by audio devices. To resolve this, right-click the Start button, open “Device Manager,” and ensure that your Bluetooth Radio drivers are updated to the latest manufacturer specifications.
If the connection remains unstable, you might need to “Remove Device” from your settings and perform a hard reset on your AirPods by holding the setup button for 15 seconds until the light flashes amber. Clearing the Windows Bluetooth cache and restarting the “Bluetooth Support Service” in your system’s services menu often resolves deeper software conflicts that prevent a clean pairing.
Optimizing Audio Quality and Low Latency Performance
Once you have mastered how to connect airpods to laptop platforms, optimizing the sound profile is the next step for a premium experience. Windows often treats Bluetooth headsets as two separate devices: “Stereo” for music and “Hands-Free” for calls, with the latter offering significantly lower audio fidelity. To ensure the best music experience, navigate to your Sound Settings and set the “AirPods Stereo” option as your default playback device while avoiding the hands-free profile for anything other than voice chat.
Furthermore, if you notice a delay between the video on your screen and the audio in your ears, disabling “Bluetooth LE Enumerator” in your hardware settings can sometimes reduce latency. These small technical adjustments ensure that your Apple hardware performs at its maximum potential even when disconnected from the Apple ecosystem.
Advanced Management: Battery Tracking and Firmware Tips
A common complaint after discovering how to connect airpods to laptop methods is the lack of a native battery indicator on the Windows taskbar. Unlike the iPhone, Windows does not natively display the individual charge levels of the left bud, right bud, and the case, which can lead to your audio cutting out unexpectedly during important tasks. To bridge this gap, many tech-savvy users install third-party utilities like “MagicPods” or “Battery Stats,” which replicate the Apple popup experience on a PC.
Additionally, remember that AirPods firmware updates can only be installed via an iPhone or iPad, so it is wise to connect them to an iOS device occasionally to receive the latest stability patches. Keeping your earbuds updated ensures they remain compatible with the evolving Bluetooth protocols of modern Windows laptops.
(FAQs)
Q1: How do I make my AirPods connect to my laptop?
Turn on Bluetooth on your laptop, open the AirPods case, press and hold the back button until the light flashes white, then select AirPods from the Bluetooth list.
Q2: How do you put AirPods in pairing mode?
Open the case lid and press the setup button on the back until the LED light starts blinking white.
Q3: Why is my AirPod not working on my laptop?
Your AirPod may not work due to low battery, outdated Bluetooth drivers, or incorrect audio output settings on your laptop.
Q4: Why aren’t my AirPods showing up on Bluetooth?
AirPods won’t appear if they’re not in pairing mode, already connected to another device, or your laptop’s Bluetooth is off.
Q5 : How do I fix AirPods not connecting to Windows or Mac?
Reset your AirPods, restart Bluetooth, forget the device, and reconnect to resolve most connection issues quickly.
Conclusion
In conclusion, understanding how to connect airpods to laptop systems allows you to bridge the gap between high-end mobile accessories and professional computing power. While the initial setup requires a few manual steps compared to the instant pairing found on Apple devices, the result is a versatile and high-performance audio solution for any task.
By maintaining your Bluetooth drivers and knowing how to trigger the discovery mode on your hardware, you ensure a reliable connection that enhances your daily productivity. Ultimately, learning how to connect airpods to laptop is a vital skill for modern professionals who demand the comfort of Apple’s design with the flexibility of a Windows-based technical environment.
By following these simple technical steps, you can successfully master how to connect airpods to laptop and enjoy a premium, wireless audio experience across all your Windows devices.