Why Is My Liquid Cooler Making a Clicking Noise? Causes & Fixes
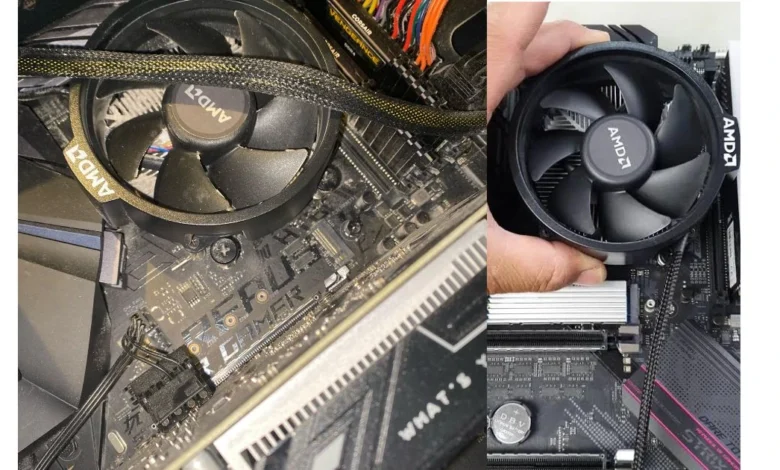
If your computer’s AIO pump is emitting an unusual ticking sound, you are likely dealing with trapped air bubbles inside the pump housing, a failing mechanical impeller, or fan blades striking an obstacle. A common cause is bubbles accumulating inside the pump block because the radiator is mounted lower than the pump itself, allowing gravity to push air to the highest point of the loop.
To fix this immediately without opening your PC loop, try setfting your pump speed to one hundred percent in your BIOS or software panel for twenty minutes to forcefully push the trapped pockets into the radiator. Alternatively, gently tilting your PC chassis at a forty-five-degree angle while the system runs will immediately dislodge the air bubbles and restore completely silent cooling performance.
Quick Troubleshooting Checklist
Before diving into the detailed troubleshooting methods, quickly verify your current hardware and operating system settings against this checklist:
- [ ] Verify if AIO pump speed is set to maximum in BIOS or control software (Step 1)
- [ ] Ensure radiator is mounted higher than the CPU pump block (Step 2)
- [ ] Check for loose power cables or obstructions striking the spinning fan blades (Step 3)
- [ ] Confirm pump voltage settings are set to constant 12V/PWM mode (Step 4)
- [ ] Check for excessive liquid splashing sounds indicating fluid loss (Step 5)
- [ ] Confirm motherboard component power delivery is stable (Step 6)
Quick Diagnostic: Liquid Cooler Noises vs. Solutions
Different hardware malfunctions generate distinct acoustic profiles inside your computer chassis. Use this reference matrix to quickly identify your specific cooling loop noise and find the verified solution to fix it.
| Type of Sound | Root Hardware Cause | Immediate Fix to Try |
|---|---|---|
| Rapid Clicking / Ticking | Trapped air pockets or low fluid level. | Set pump speed to maximum or tilt PC chassis. |
| Loud Rattling / Scraping | Fan blades hitting power cables or shroud. | Clear physical obstructions from cooling fans. |
| Harsh Grinding / Whining | Broken bearing or dead mechanical impeller. | Replace the internal AIO cooler under warranty. |
| Occasional Gurgling | Natural fluid evaporation inside tubes. | Reorient radiator to be higher than pump block. |
Common Installation Mistakes causing Noise
Many liquid cooling issues stem from minor installation errors rather than broken components. Review this comparison chart to ensure your cooler configuration aligns with recommended factory engineering practices.
| Mistake | Why It Causes Noise | Correct Setup |
|---|---|---|
| Bottom-Mounted Radiator | Forces air bubbles to trap in the pump block, causing dry running and clicking. | Top-mount the radiator or front-mount with tubes at the bottom. |
| Loose Cable Management | Cables drop into radiator fans, creating a persistent ticking sound mimicking pump failure. | Tie down cables away from fan shrouds. |
| Fluctuating DC Voltage | Motherboard automatically reduces pump power, causing motor stuttering and vibrations. | Lock the AIO header to constant 12V/PWM mode in BIOS. |
Step 1: Dislodge Trapped Air Bubbles From the Pump Block
When a liquid cooling loop experiences minor fluid evaporation over several months, small air pockets naturally develop within the sealed tubes. If your setup configuration places the cooling block at the highest physical point of the loop, these pockets aggregate directly inside the impeller chamber.
This specific accumulation of air disrupts the smooth rotation of the internal hardware components, which answers why is my liquid cooler making a clicking noise during regular boot cycles. To fix this, you must force the trapped air out of the delicate pump head mechanism.
Start your computer and log directly into your main motherboard hardware control software or BIOS configuration page. Locate the fan curve management panel, select your dedicated AIO pump header, and temporarily force its operational speed to maximum capacity.
Let the system run continuously at full speed for fifteen to thirty minutes to let the high-pressure fluid stream push the air out. While the system operates at full load, carefully tilt your entire desktop tower side-to-side to help clear the stubborn pockets.
Step 2: Correct Your Radiator Mounting Orientation
Incorrect hardware installation remains a massive reason behind premature component failure and loud desktop acoustics. Many PC builders mistakenly mount the liquid cooling radiator at the bottom floor of their chassis, below the CPU level.
Because air always migrates to the highest physical zone inside a liquid system, a low radiator forces the air into your processing block. This continuous dry operation wears down the internal bearings and triggers persistent mechanical clicking sounds.
To fix this setup issue permanently, you must ensure that at least a portion of the cooling radiator sits higher than the CPU pump block. The absolute best placement is mounting the radiator flush against the top panel of your computer case as an exhaust system.
If top mounting is impossible due to motherboard clearance issues, install the radiator on the front panel with the rubber tubes positioned at the bottom. This layout ensures that any wandering air pockets remain safely trapped at the top reservoir of the radiator away from moving components.
Step 3: Clear Obstructions From the Radiator Cooling Fans
Checking Fan Blades and Wire Clearances
Sometimes an intimidating mechanical sound coming from your cooling loop has nothing to do with internal fluid performance. High-static pressure fans mounted against a radiator operate with incredibly tight tolerances inside a compact PC case.
If a loose power cable shifts slightly, the spinning fan blades will strike the wire shroud and create a rapid ticking sound. This external friction mimics pump failure closely, leading users to falsely assume their entire liquid setup is broken.
Shut down your computer completely and flip the main power supply switch to the off position before touching internal components. Manually spin each radiator fan blade with your finger to check if it rotates smoothly without hitting any surrounding wires.
Inspect the internal fan frames for cracks or alignment warping that might cause the blades to rub against the metal radiator fins. Secure any loose power cables safely using plastic zip ties to keep the fan area completely clear.
Inspecting Hardware Bearings and Fan Motor Warping
If the blades are clear but a fan still creates noise, the internal sleeve or ball bearing might be failing due to dust accumulation. Over time, high temperatures dry out the factory lubricant inside the fan motor assembly, causing structural friction.
To isolate this problem from your pump, temporarily disconnect the radiator fans from the motherboard headers while leaving the main pump powered on. Turn on the PC for sixty seconds; if the sound disappears, your AIO pump is perfectly healthy and you simply need new cooling fans.
Step 4: Adjust Pump Voltage Settings in Your System BIOS
Tweaking PWM Duty Cycles for Sound Optimization
Many modern liquid coolers are designed to run at full voltage constantly, but certain hardware models exhibit electrical resonance at specific speeds. If your system runs the pump via a standard chassis header, the motherboard might be supplying fluctuating power levels.
This irregular power output can cause the motor to stutter, leaving you with consistent hardware vibrations or pump motor ticking during idle desktop usage. Locking the voltage parameters into a stable profile resolves these minor electronic component vibrations.
- Restart your computer and tap the Delete or F2 key repeatedly to enter your motherboard BIOS environment.
- Navigate directly to the hardware monitor tab and locate the fan control section to view your current system cooling curves.
- Change the controller setting of your AIO pump header from DC mode over to automated PWM mode.
- Save changes and reboot your system.
This specific adjustment forces the motherboard to deliver a smooth, consistent twelve-volt stream to the hardware motor, eliminating speed fluctuations.
Resolving Performance Setting Conflicts
Certain aftermarket control software utilities can conflict with your hardware BIOS fan curves, causing conflicting speed signals to reach the pump. Programs like NZXT CAM, Corsair iCUE, or Asus Armoury Crate can accidentally override your manual hardware settings during Windows startup.
Ensure you update your proprietary cooling software to the latest version to patch known firmware communication bugs. If the hardware noise only starts after loading your desktop, reset the software profile back to its default silent preset.
Step 5: Check Fluid Levels for Permeation and Fluid Loss
Even though modern liquid hardware utilizes high-density rubber tubing, a tiny percentage of liquid naturally evaporates through the hoses over several years. This slow material process is known as permeation, and it eventually drops the fluid levels below operational safety standards.
When the fluid volume becomes too low, the pump impeller draws in a mixture of liquid and continuous air. This lack of constant lubrication causes the internal components to rattle and create persistent clicking sounds.
- Safely unmount the radiator from your case while keeping the pump attached to the processor.
- Gently shake the radiator near your ear and listen for excessive liquid splashing sounds inside the internal tanks.
- If the unit sounds mostly empty or hollow, the loop has reached the end of its functional lifespan and requires replacement.
Step 6: Verify Motherboard Component Power Delivery
A hidden cause of hardware noise is insufficient power delivery from an overloaded or failing computer power supply unit. If your graphics card and processor draw maximum wattage, an unstable power rail can cause the pump motor to lose torque.
This temporary voltage starvation prevents the impeller from spinning at its required speed, generating a clicking noise under heavy loads. Connect your main pump power lead to a dedicated SATA power adapter directly from the power supply rather than relying on motherboard headers.
Conclusion
Fixing a clicking liquid cooler is a straightforward diagnostic process that usually involves migrating trapped air pockets or locking BIOS voltages rather than replacing expensive components. In the vast majority of PC builds, maximizing pump speed or adjusting the physical mounting orientation of the radiator will completely silence your computer setup. Taking a few minutes to clean out loose power wires from fan shrouds and securing stable power streams ensures long-term hardware durability.
Summary & Actionable Advice: If none of these software, layout, or positioning adjustments silence the clicking sound, the issue points to physical wear within the internal mechanical bearing or a low fluid level due to permeation. Always test your pump header configurations first before spending money on new parts. If you want to optimize your desktop stability and rule out other operating system display dependencies, read our comprehensive guide on how to handle Windows 11 black screen errors or leave a comment below with your specific cooler model for customized technical help.
(FAQs)
Can a clicking AIO liquid cooler damage my computer processor?
No, a clicking noise caused by air bubbles will not damage your CPU immediately, but if the pump stops completely, your processor will overheat and shut down safely.
How long does it take for air bubbles to clear out of a new liquid cooler pump?
New systems usually clear their internal air pockets within twenty-four hours of regular usage, but you can speed up the process by running the pump at full speed
Should I refill my sealed AIO liquid cooler if it loses fluid over time?
No, standard AIO coolers are completely sealed systems that cannot be refilled safely, so you must replace the entire unit if permeation occurs.
Is it normal for a liquid cooler pump to make a loud whining noise at maximum speed?
Yes, a high-pitched hum is completely normal when an AIO pump operates at one hundred percent speed, but it should never produce a metallic clicking sound.
Why does my liquid cooler start clicking only when I launch demanding video games?
Games force your graphics card to heat up, which increases internal case temperatures and causes loose fan blades or warm air pockets to expand.